How can we help you?
Payment & Appointment Setting
In this article, you will learn about the booking and cancellation of appointments and payment settings.
Steps to understand the Appointment and Cancellation process:
Step-1. In the Organization menu, Click on the ‘Setting’ icon.

Step-2. Then in Payment Setting, click on the ‘Appointment and Cancellation policy’ option.

Here, there are 4 options ‘Booking Settings, Cancellation Policy, Payment settings, and Membership Settings’.

1. Booking Settings

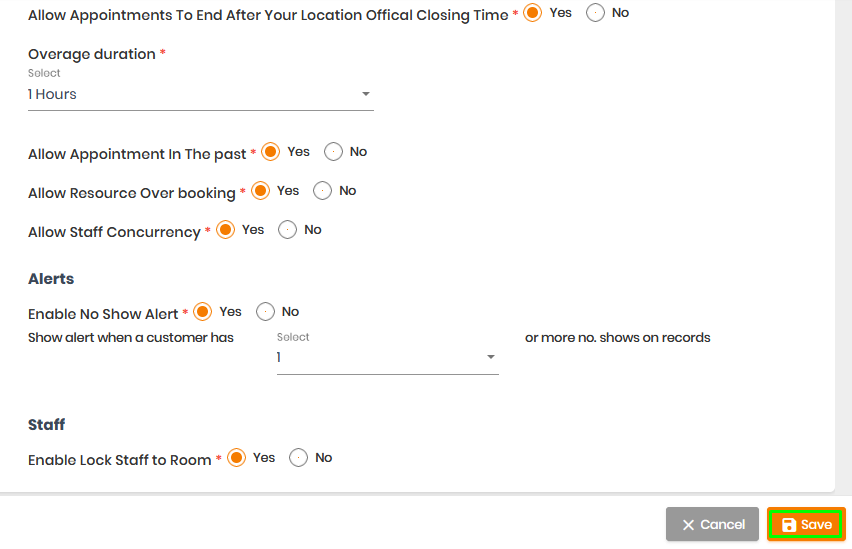
Steps:- Click and select yes or no according to your requirements on all the info related to booking appointments like allowing appointments after office closing time, allowing appointments in the past, resource overbooking, checking staff concurrency, etc.
2. Cancellation Policy

Step-1. Enter the mandatory details marked with ( * ).
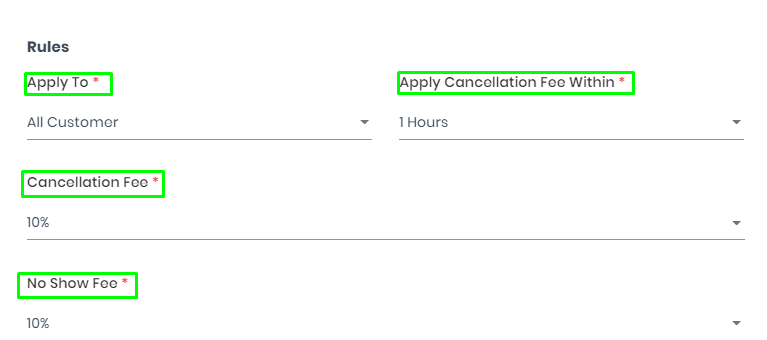
Note:- Here No Show Fee means if the customer is not present at the time of appointment, the fees charged for that are called No Show Fee.
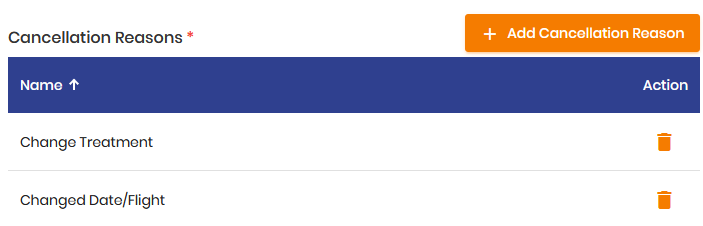
Step-2. Enable Cancellation Reason and Cancellation Policy Text.
Step-3. Add ‘Cancellation Reasons’.
3. Payment Settings

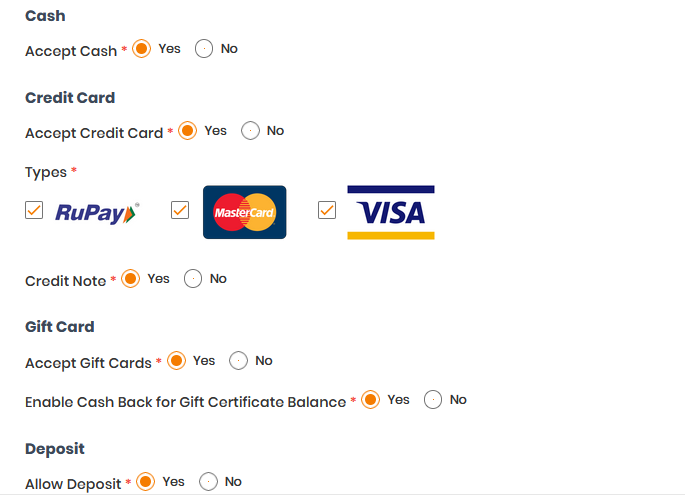
Step-1. There are different types of payment options are available to choose from according to your preference like accepting cash, credit card, checking credit notes, gift cards, etc.
Step-2. Now select different card payments like Visa, Rupay, Mastercard, etc. according to your preference.
Step-3. If require then you can also add Online Payment Details.
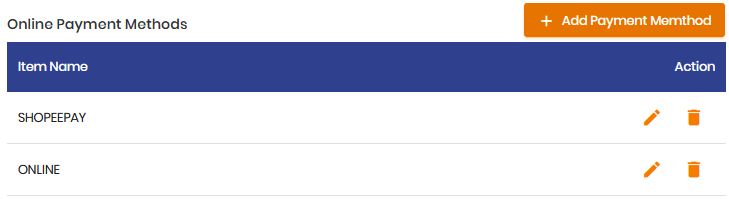
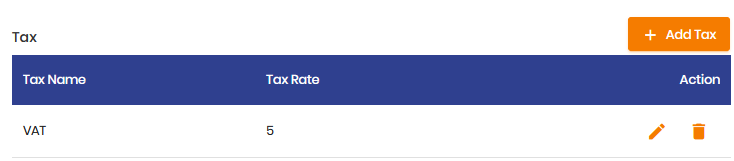
Step-4. Add different tax and tax rates.
Step-5. After enabling all the payment info, click on the ‘Save’ button.
![]()
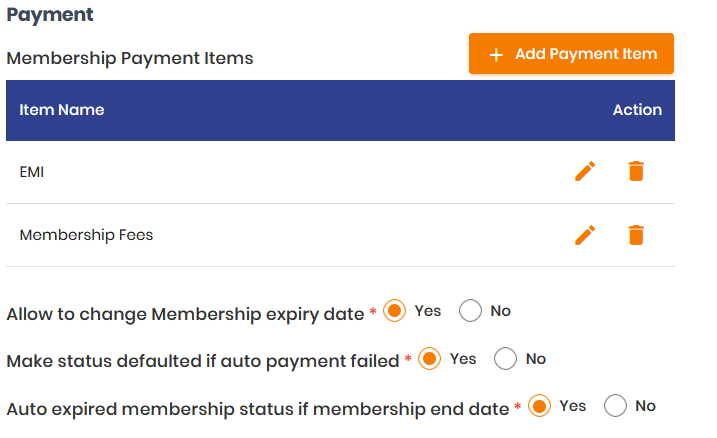
4. Membership Setting
Step-1. Add the Membership Payment item and enable the other options as shown below.
![]()
Step-2. After enabling all the membership info, click on the ‘Save’ button.
![]()
